
The EntGenAI WordPress Plugin allows you to easily create with AI within your WordPress website, and to create workflows to give your site agentic super-power.
This plugin helps you connect your site to leading AI providers — OpenAI, Anthropic, Google Gemini, or even a locally-running Ollama instance — and start generating content, researching trends, and building AI-powered workflows, all from within WordPress.
This post walks you through installing EntGenAI, configuring it, and making the most of its core features.
For a short video about the Agentic capabilities of the plugin watch this YouTube video (less than 3 minutes long).
What Is EntGenAI?
EntGenAI is a WordPress plugin that integrates Generative AI (GenAI) and agentic workflows directly into your site. Rather than exporting content to a separate tool and copying it back, EntGenAI lets you:
– Generate pages and posts via a prompt, saved automatically as drafts for your review.
– Research trending topics and produce contextually relevant blog drafts that match your writing style.
– Connect to external MCP (Model Context Protocol) servers to fetch live data.
– Expose your own tools to any MCP client (Claude for Desktop, Cursor, etc.).
– Give AI capabilities to your other plugins and themes programmatically.
Importantly, you stay in control. Every piece of AI-generated content lands in WordPress as a draft. You review it, edit it, and decide whether to publish.
Requirements
In order to use the plugin, your environment must have WordPress version 6.5 or later, PHP version 8.1 or later, and an AI API key from your chosen provider (OpenAI, Anthropic, Google Gemini, or other).
EntGenAI does not bundle a model. It is a client that connects to an AI service you already have access to.
Installation
Install the plugin in the usual WordPress way: from within the admin interface of WordPress, select Plugins → Add Plugin then enter EntGenAI in the Search Plugins input control. WordPress should find and display the plugin, and you must choose Install Now. Once installed Activate the plugin.
Configuration
Once activated, navigate to Dashboard → EntGenAI Options → Config, and enter your preferred AI Provider, Model and API Key (see Figure 1). These details determine what LLM will be used whenever the plugin needs to submit a prompt on your behalf.
You can also configure whether generated content is saved as draft pages or draft posts.
Finally, press Save Settings.
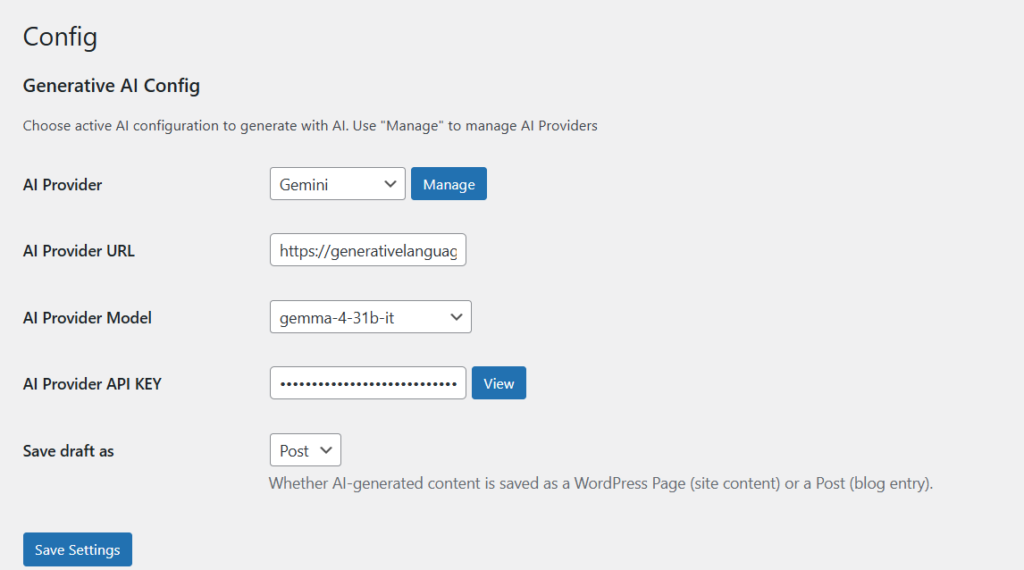
By default the plugin supports OpenAI, Anthropic, Google Gemini, and a locally installed Ollama, but additional providers can be registered through the Manage button in the Config section.
Notice that if you run Ollama locally on the same server as WordPress, no data ever leaves your machine.
Generating Content with the “Generate” Feature
This option gives you a very quick way to produce a page or post from a prompt.
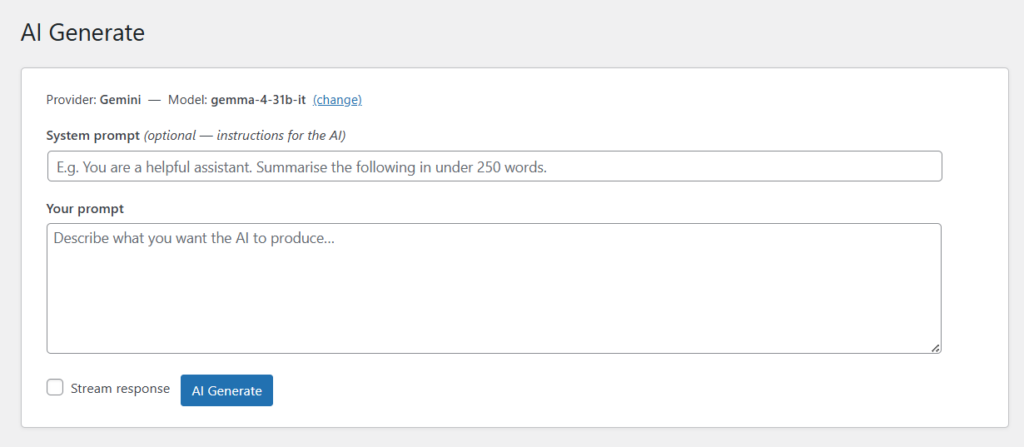
1. Go to EntGenAI Options → Generate (See Figure 2). The active provider is shown at the top.
2. (Optional step) Enter a system prompt to set the tone, persona, or constraints for the AI.
3. Enter your content prompt — for example:
Write a short article (around 600-words) explaining how agentic AI is changing the finance industry
4. Click AI Generate and wait for the response.
5. When the result appears, click Store as Draft to save it to WordPress.
6. Open the draft in the WordPress editor, refine it as needed, and publish it when you are satisfied.
Using the “Blogger Draft” Feature
The Blogger Draft feature is designed for content creators who want AI to handle topic discovery as well as writing. It has its own additional config/settings section, as it can be use with or without an MCP server.
EntGenAI makes use of Logiscape’s mcp-sdk-php library to provide the MCP capability.
Basic workflow (no MCP server needed)
1. Navigate to EntGenAI Options → Blogger Draft.
2. (Optional) Enter a topic hint to guide the AI.
3. Click Generate Draft.
4. The plugin returns a list of trending topics, selects the best match, and generates a full draft — which is simultaneously saved as a WordPress draft.
5. Click Open Draft in Editor to review and edit directly in WordPress.
6. If the result doesn’t suit you, click Generate Another to try again.
With an MCP server for live trend data
For more current trend data, configure one of the two built-in MCP sources in the Blogger Draft settings panel:
– Brave Search API — requires a Brave API key (obtainable from Brave’s developer portal).
– MCP server-fetch — requires a running `@modelcontextprotocol/server-fetch` instance on your server.
With either source active, the AI queries live web data before drafting.

Programmatic Usage (For Plugin/Theme Developers)
This is a programmatic feature, so there is no visual interface, but it is the most powerful, even on the current version of the Plugin, as a programmer could create a whole workflow around it, to chain together a sequential set of steps, including calls to the LLM, and to tools provided locally and by remote MCP servers.
EntGenAI exposes several WordPress hooks for developers who want to embed AI capabilities in their own code.
Submitting a generation request
```php
$response = apply_filters('entgenai_generation_request', '', [

    'prompt'        => 'Summarize the latest trends in renewable energy.',

    'system_prompt' => 'You are a concise technical writer.',

]);
```
Receiving the AI response
```php
add_action('entgenai_completion_response', function( $provider, $prompt, $content ) {

    // $content holds the generated text

    error_log( 'AI response: ' . $content );

}, 10, 3);

```
Calling a tool on a remote MCP server
```php
$result = apply_filters('entgenai_mcp_call_tool', null, [

    'server_url' => 'https://your-mcp-server.example.com',

    'tool'       => 'search_web',

    'args'       => [ 'query' => 'agentic AI 2026' ],

]);

```
Listing tools available on a remote MCP server
```php
$tools = apply_filters('entgenai_mcp_list_tools', [], 'https://your-mcp-server.example.com');

```
Registering your own tools on EntGenAI’s built-in MCP server
```php
add_action('entgenai_mcp_register_tools', function($mcp_server) {

    $mcp_server->tool(

        'get_latest_orders',

        'Returns the last N WooCommerce orders',

        [ 'count' => 'integer' ],

        function( $args ) {

            // your implementation

            return get_recent_orders($args['count']);

        }

    );

});

```
Once registered, your tools are available to any MCP client connecting to the `/wp-json/mcp/v1/mcp` endpoint — including Claude for Desktop and Cursor.
That’s it for now. This plugin is still work in progress and several additional features and examples are still under development.
Give it a try, and report any bugs you find.
Thank you for reading!